

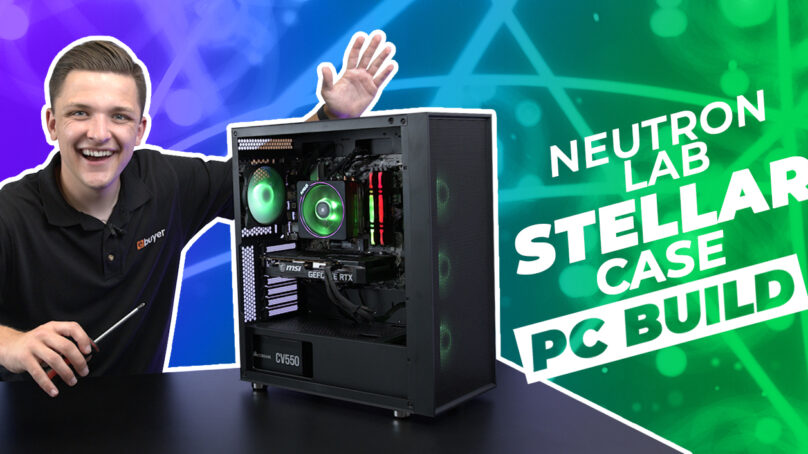
Neutron Lab is one of the freshest brands in the PC hardware space, and it specialises in case and peripheral products with high-quality components and great out-of-the-box performance. Instead of just unboxing the case and quickly glancing over its key features, we’re going to perform a full-on deep dive into the Stellar case – by building a gaming-capable system using it!
We’ll walk through the process, step-by-step, using parts all available from Ebuyer. Along the way, we’ll be sure to highlight any interesting features and top tips for building inside this Neutron Lab Stellar PC case.
Unboxing
First thing’s first, let’s introduce our substantial array of gaming-grade components:
AMD Ryzen 5 3600 processor with Wraith Stealth cooler
Crucial Ballistix RGB red DDR4 16GB (8GBx2) 3200MHz DRAM
Corsair Force Series MP510 480GB M.2 NVMe PCIe Gen3 solid state drive
ASUS Prime B450M-A II mATX motherboard
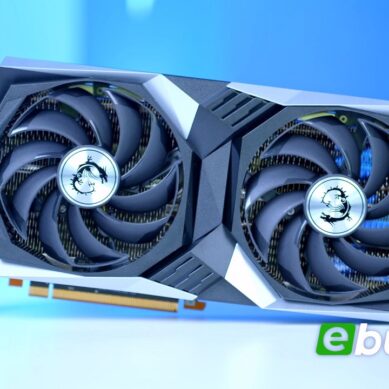
MSI RTX 3060 VENTUS 2X graphics card
Corsair CV Series CV550 550 watt power supply
We’ve got all the components already unboxed and a delectable smorgasbord of gaming goodness has spread over our building surface! Of course, if you’re going to unbox everything you should ensure you’re comfortable leaving delicate components exposed, but it’ll make the PC-building journey snappier.
Neutron Lab Stellar
We’ve got to highlight our particular case choice today, since it’ll be the supportive back bone of our entire system – the Neutron Lab Stellar.
The side-spanning tempered glass panel is a definitely eye-catching, providing a not-so subtle sneak peak inside you system, but a full-blown display of all the glorious RGB.
Speaking of, 4 RGB fans are pre-installed in the case, with a dedicated controller for seamlessly synchronising and cycling through your favourite lighting effects.
However, great aesthetics don’t have to compromise on performance. First and foremost, the case is all about high airflow. The mesh front panel is as close as you can get to unrestricted ventilation for your heat-producing components, stopping just short of stripping off the front panel entirely.
The open, perforated design is backed up by magnetic dust filters for easy cleaning. It’s a well-sized case ideal for building, coming in at 425x215x480 (Length, width, height). The storage solution’s well stocked, with three SSD and three HDD bays.

Processor – AMD Ryzen 5 3600
Let’s start, by bringing the all-important motherboard front and centre. It acts as the core foundation of PC building. Once we’ve added various components bit-by-bit, then we’ll transfer it into the case.
Firstly, the CPU. Hold it by the edges to prevent bending the processor’s pins, and to keep the surfaces free from grease and dirt.
On the base of the CPU, notice a little gold triangle in the corner – this should align with the corresponding triangle on your motherboard’s CPU socket.
Lifting the CPU socket’s retention arm, gradually and carefully ‘drop’ the CPU into place. It really is that simple. No need to exert any additional force, it should settle into place comfortably.
Feel free to give it the lightest of adjustments to ensure it’s seated correctly, before lowering the retention arm back into its original position to safely secure the CPU.

If you’re looking for an Intel-equivalent guide, we’ve produced a handy step-by-step guide to installing Intel Core i7 11700K processor and Asus ROG Maximus XIII Hero motherboard. Intently focused on these two key components, you may discover additional top tips not covered in this comprehensive guide.
Memory – Crucial Ballistix RGB
With arguably the most delicate, nerve shaking process out of the way, it’s time to move on to the relatively breezy memory (RAM) installation. Our kit is coloured red, practically begging us to customise the RGB for a cohesive, all-red set-up.
For the fastest potential speed, make sure the RAM is installed in ‘dual channel mode’. Consult your motherboard’s manual for the optimal configuration. On our board, it’s a simply a case of using both the grey-coloured RAM slots.
Pulling back the retention clips, slide the RAM in place. Watch out – the slot is specifically notched for one-way only installation. Once you’re confident it’s accurately aligned, apply an equal amount of pressure to either side of the sticks and wait for the satisfying ‘click’.
Repeat for as many sticks you’ve got. We’re leaving two slots unoccupied for now, but it’ll make for great upgrade potential later down the road.

Solid state drive – Corsair Force Series MP510 M.2 NVMe PCIe Gen3
Usually, next up would be the CPU cooler, but since our M.2 NVMe SSD is so slim-line, let’s get it out of the way before the other sizable components.
For a modern gaming PC, an SSD is practically essential in providing super-fast boot up times, loading screens and an overall snappier operating system.
For this step, a ‘teeny-tiny’ GeekAWhat-approved screwdriver is recommended for removing the smaller, pre-installed retention screw on the M.2 slot. Slide in the drive and secure it down using said screw.

Applying thermal paste
That’s the CPU, RAM and SSD installed already – we’re racing though these components at breakneck speed. Our PC will be up and running in no time!
With an AMD Ryzen processor, a cooler is usually included in-box with thermal paste pre-applied. However, we’ve already used our cooler in a previous build, so we’ll need a fresh application of thermal paste.
Applying directly to the top of the CPU, a pea-sized amount is commonly referenced. A little goes a long way, as the mounting pressure of a bulky cooler will spread out the paste evenly, filling in the imperceivable imperfections on the CPU’s surface for distributed heat transfer.
Cooler – included with processor
Installing the cooler is usually the trickiest part of process, as it quickly becomes quite fiddly when screws and mounting plates are involved. Thankfully, the included stock cooler is designed for practicality and a speedy, builder-friendly installation.
Take note of the metal tabs with cut-outs dangling from the side. These’ll slot over the retention clips pre-installed on our motherboard. Hook one tab over a clip, lower the cooler down and fasten down the other hook. Once lined up, push down the fastener lever to firmly secure the cooler in place.
This method’s so sturdy, you can even hold the entire motherboard set-up by the cooler. Left over is a couple of wires, RGB and fan header, to plug in. They’re conveniently located together at the top of our board – RGB on the bottom, fan on the top.

Cable management with zip ties
Being the first cables we’ve had to wrangle, and it’s generally good practice to engage in a bit of customary ‘cable management’. Pairing back the cables is not purely for picture-worthy aesthetics, but it aids airflow through the case and makes future upgrades easier.
Neutron Lab includes a handy accessory bag, with relevant case screws and a bunch of zip ties for a clutter-free enclosure. We’ve bunched up our cooler’s cables and bound them tightly so they aren’t hanging loosely.
Stand-offs and rear I/O
The motherboard assembly is complete, so we’re ready to move into our Neutron Lab case. It’s always best practice to remove as many panels as possible so you have open-access clearance to every nook and cranny.
This Stellar case includes a much-welcomed detail – the middle stand-off is slightly raised. This lone stand-off will stoically support the motherboard during installation, making this entire process pain-free.
And, of course, we mustn’t forget – the rear I/O shield. Even experienced PC builders slip up on this step. Before screwing down the motherboard, make sure it’s installed. It’ll save you a lot of potential frustration down the line.
Some motherboards come with the rear I/O shield pre-attached, but ours is separated. It simply slots into the back of the case, requiring a bit of fiddly pressure until it eventually clicks into place.

Motherboard – ASUS Prime B450M-A II mATX
Slotting the motherboard’s I/O through the shield we just installed, slide the motherboard into place using the aforementioned raised stand-off, saving the motherboard from falling down. This provides us some respite to leisurely prepare the next step. With the included case screws, find the stand-offs poking through the holes in the motherboard and tighten down.

Graphics card – MSI RTX 3060 VENTUS 2X
Next up, the penultimate part of our PC build – installing the graphics card. Ours is an MSI RTX 3060, using NVIDIA’s 2nd generation Ampere architecture. With incredible performance, enhanced ray tracing capabilities and fully-fledged, AI-powered Tensor Cores for smart, native-quality upscaling using Deep Learning Super Sampling (DLSS).
The RTX 3060 represents the ideal mid-ranged card for 1440P gaming. Cyberpunk 2077, Call of Duty: Warzone (now with DLSS support!), and more – today’s top games are no match for this card.

Removing PCIe covers
First, we need to decide where the graphics card goes and remove the relevant PCIe covers impeding progress. Ideally, it’ll slot into the fastest PCIe slot, our being the highest slot.
Hovering the graphics card over the slot, we’ve correctly identified cover two and three so need removing.
Un-screw the PCIe covers, but keep hold of the screws. We’ll re-use them to fasten down the graphics card for a wobble-free installation.
Our graphics card is a two-slot design, so we only need to remove two covers. If your graphics card is on the chunkier side, or you’re installing other PCIe-compatible accessories, remove covers as necessary.

Installing graphics card into PCIe slot
With accommodation freed up, push back the PCIe slot’s cover, and slide the card in. Apply some equal pressure and listen out for an audible ‘click’ to confirm it’s secure. Now, using the screws we removed earlier, re-screw against the graphics card’s support bracket.
Power supply – Corsair CV Series CV550
So that’s the CPU, thermal paste, cooler, RAM, SSD, motherboard, case and the GPU! What’s next, the final piece of the puzzle?
Of course, our power-hungry components need a power source and, unfortunately, it’s not simply a case of plugging in a singular power cable. We need to manually hook up each component to a power supply unit (PSU).
Spin the case around and slide the PSU into the back. Given our case has plenty of ground clearance with substantially sized feet, we’re mounting our PSU fan-down, drawing in fresh air from below.

Power supply cables
The power supply introduces a whole host of cables, some we don’t actually want. Let’s single out the relevant cables for our particular build and tuck the rest away.
Our graphics card only requires an 8-pin cable. Higher powered graphics cards may require more connectors.
The motherboard’s cable is easily identifiable by the hefty 24-pin connector, plugging into the right-side of the motherboard.
Finally, the 8-pin CPU power connector located in the top-left of the motherboard. This is routinely our least favourite part of PC building. It’s situated in the most cramped location, requiring you to contort your hand to awkward shapes. We’d recommended angling a light towards the connector, so you have sufficient line of sight before heading in.
Front panel connectors
With the individual components wired up, we just need to provide full functionality to the case itself; buttons, front-panel ports and blinking LEDs.
These connectors are quite fiddly, a consistent tripping-up point for most inexperienced PC builders, so let’s break them down one-by-one.
USB3 is clearly communicated by the bright blue colouring. HD Audio is finely imprinted on the plastic connector. USB2 is visually nearly identical to HD Audio – so don’t accidentally switch the two. Finally, we have our individual pinned connectors for hard drive indicator LED, power switch and power LED.
For installation, the HD Audio goes in the bottom-left of the motherboard, USB2 centre-bottom, pinned connectors bottom-right and USB3 is notched only going in vertically.
These are generalised locations, on rare occasions they may be placed seemingly at random, so always consult your motherboard manual.
You’ll also want to wire up your fans at this point, and ensure you adhere strictly to a cable management policy so your system is free from unnecessary clutter.

First boot!
Have we got everything right first try? Will out system even turn on? There’s only one way to find out!
Clicking in the power button and, instantaneously, the fans whir to life. RGB glows and electricity courses through the system. Our Neutron Lab Stellar case can cycle through the RGB using the dedicated front-panel button, synchronising with our impressive looking Crucial Ballistix RGB RAM.
It’s an exhilarating feeling, the nerves of first-time PC building subside and you can bask in the glory of your hand-built creation – working first-time, no less!

This Neutron Lab Stellar case has been a pleasure to build in. It comes easy recommended for first-time and experiences builders alike.
We’ve previously covered the Neutron Lab Galaxy, another fantastic case which we gave the all-important thumbs up.
If you’d rather not risk building your own gaming PC, Alphasync offers up a range of gaming-grade pre-built computers delivered straight to your door, no assembly required. In the past, we’ve been thoroughly impressed by their systems, like the Alphasync Canine 465X.


Poll