
The current generation of gaming consoles makes it easier than ever to broadcast a live gameplay feed to friends (and even total strangers). This can be done in several ways, depending on your needs and budget. If you want to get fancy, you can invest in a dedicated capture card, installed into the PCIe lane on a nearby PC. But if you’re reading this, the chances are that you’re only just getting started – and so it’s worth first getting acquainted with the PS4’s built-in streaming capabilities. Here, we’ll look at how to get started livestreaming with your PS4, and consider how to take things further.
What do I need?
Before we dive in, let’s discuss the tools you’ll need. The first, obviously, is the console itself, along with any games you’re looking to stream. The next is a PlayStation Camera, which, while not a requirement, makes your streams that much more engaging and watchable by allowing you to overlay your reactions. You’ll also need a microphone – there are a range of options available, all of which connect directly to the console.
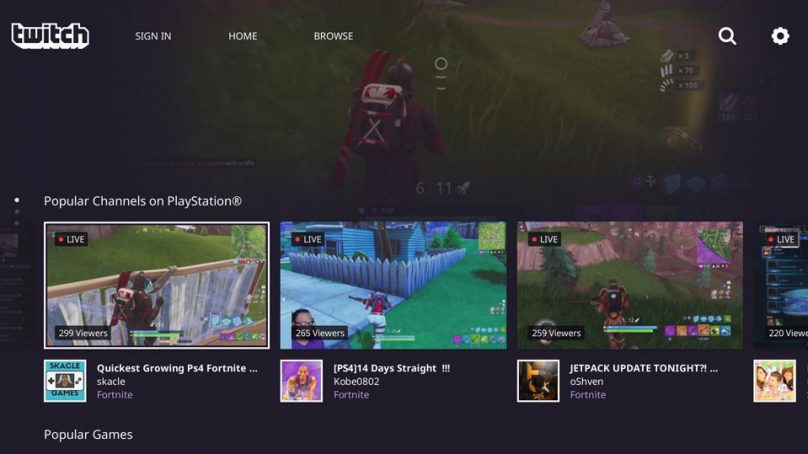
You’ll also need to be signed up to whichever streaming service you’d like to use. There are three to choose from: Twitch, YouTube and Dailymotion. Of these, Twitch is the most popular – but if you already have an account on the other services, you might prefer to get started with those.
Finally, we’re also going to suggest that you plug a hard RJ45 ethernet cable into the back of your PlayStation. While the latest PS4 Pro does allow for respectable performance over WiFi, there’s nothing as rock-solid as a hard-wired connection. If you’re looking to stream often, then look at threading cable through the floorboards, from your router to your gaming set-up.
Streaming from within the PS4
All you need to do to stream on your PS4 is launch the game you’re looking to stream, and follow these simple steps: Press the Share button – that’s the little black one just next to the D-pad. You’ll then be presented with a menu describing your sharing options. From here, select Broadcast Gameplay. Next, you’ll be prompted to choose which of the available services you’d like to broadcast on – select whichever you prefer. You’re almost ready to start broadcasting, but before you do, you’ll need to configure your stream to your taste. If you have a microphone and camera plugged in, here’s where you’ll be able to activate or deactivate them via tick-box switches. You’ll also be able to choose whether or not viewer comments appear on screen.
Next, you’ll have to choose a suitable title – something that’s eye-catching and relevant to your video. If you’re broadcasting via YouTube rather than Twitch, you’ll also have the opportunity to compose a description – this is the text that’ll appear beneath the video in the browser version of YouTube.
You’ll then choose a quality – from 1080p, 720p, 540p and 360p, depending on the PS4 you’re using, in both high and standard frame rates. The higher this setting, the more taxing it’ll be on your home network. Some experimentation might be in order before you arrive at the optimal configuration. You’ll have the option of sending out an automatic Tweet with a link to the livestream for all of your Twitter followers to enjoy, as well as the ability to invite people on your PlayStation Friends list. If you want to build an audience, this is the sort of self-promotion you need to indulge in – automating things makes this a lot easier.
If you’d like more control over the stream, consider delving into the Advanced settings before you get going. There’s considerable depth to plumb here, with separate menus for audio and video sharing. You’ll be able to use the former to control whether microphone audio is included in video clips and broadcasts, and you’ll be able to use the latter to specify whether the video going into your camera will be overlayed on your video clips and broadcasts.
The advanced options also allow you to customise a message to display to spectators. It’ll appear at the bottom of your screen, and makes a great way to both promote future content and ask your spectators to subscribe to you.
Why Bother with External Capture Cards?
If the PlayStation 4 already has streaming abilities under the hood, what’s the point of investing in an external solution? Let’s take a moment to assess the advantages of an external capture card for your PS4.
To begin with, capture cards have far superior hardware resources, so they can handle lots of video information at higher bitrates. If you’re trying to demonstrate the awesome graphical niceties of a recent game like Red Dead Redemption 2, maximum quality is crucial. If your viewers can’t discern the details, they’ll leave and find a different channel.
An external card will also allow you to bring in your own customised overlays. While the PlayStation’s built-in overlays are a welcome addition, they’re very limited when you compare them to what’s possible on current PC-based streaming software like OBS. A separate streaming device and computer will also allow you to more easily monitor the feedback you’re getting from your audience, and quickly alter settings on your stream without interrupting gameplay.
Most commercially available capture cards are capped out at 1080p – and some of them will only pass through the 60fps signal, effectively halving the frame rate of the streamed signal. If you’d like to stream (or record) a 4K signal, you’ll need to invest in a 4K capture card. The limitations of USB 3.0 mean that these cards must be plugged directly in a PC’s PCIe slots – which means laptop users are out of luck.
In short, the PlayStation 4’s built-in streaming capabilities are an enormous step forward for those looking to share this sort of content online, but at the moment they can’t quite compete with dedicated hardware for quality and ease of customisation. When you decide you’d like to take streaming more seriously, investing in an external capture card will be worthwhile.


Poll