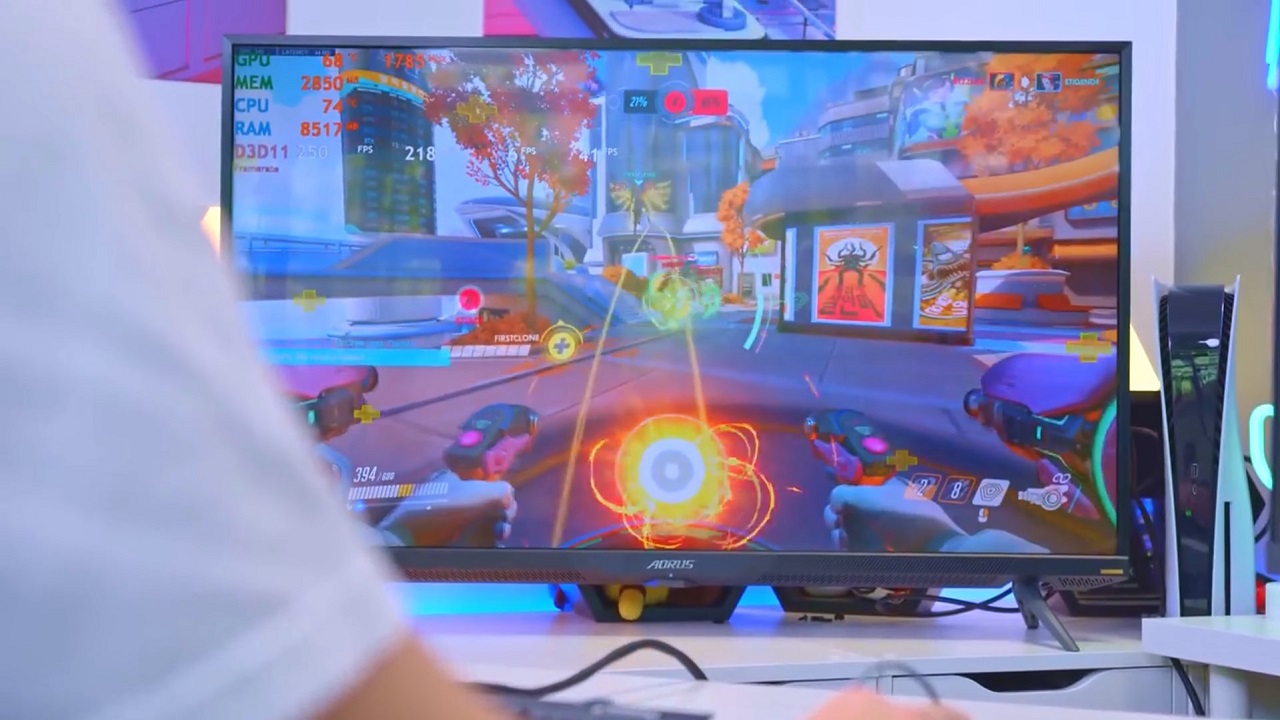
Pushing exceedingly high resolutions and refresh rates, gaming monitors are impressive pieces of kit. As is the case with most high-performance technology, they’ve got to be set up properly to get the best experience out of them. Whether you’re picking up a brand-new gaming monitor or are looking to tune your current one, here’s a checklist of things every gamer should run through when setting up their gaming monitor.
HDMI vs DisplayPort
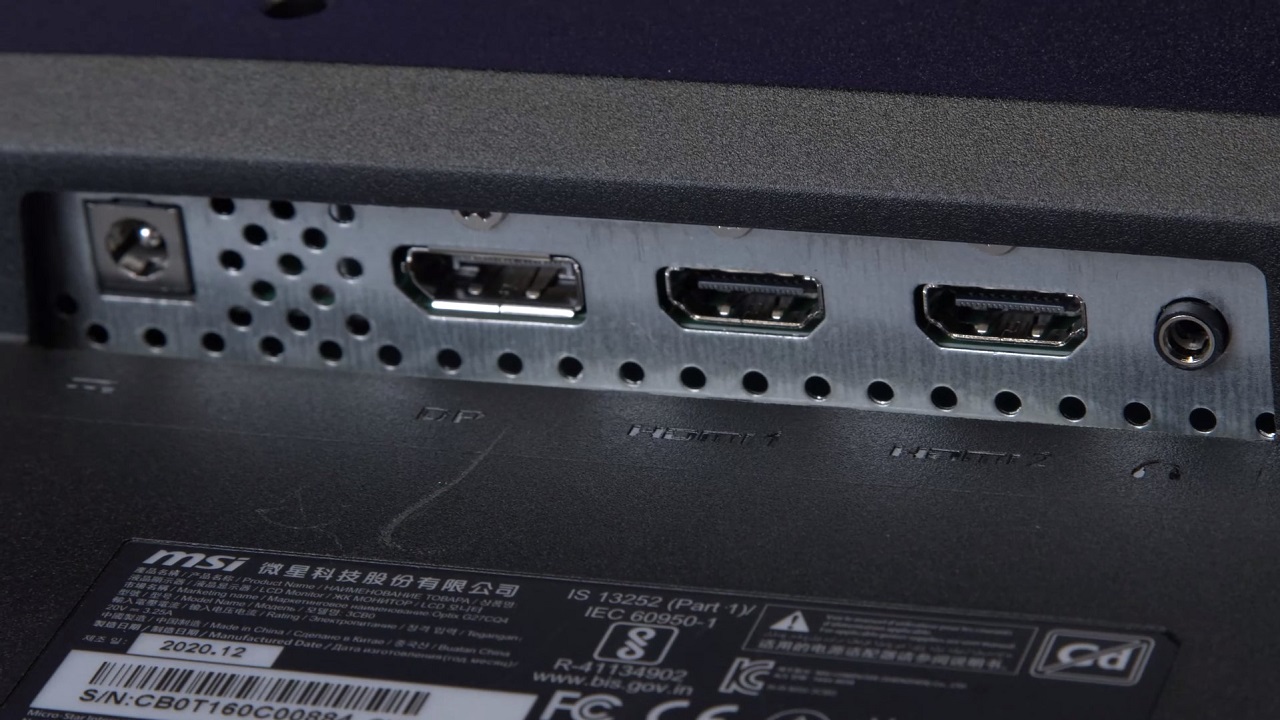
If you’ve ever tuned into one of Ebuyer’s YouTube videos on gaming monitors, you might’ve wondered why guest presenter James often says DisplayPort is his favourite connector over HDMI. When you look at a gaming monitor’s port selection, it’s usually an even split between the number of DisplayPort and HDMI ports. So, if they both perform the same role and are treated equally by gaming monitor manufacturers, what is it that makes DisplayPort better than HDMI?
HDMI
HDMI is the older technology out of the two, and it was designed to support a wide range of consumer devices. We’ve hooked up multiple generations of consoles and graphics cards over HDMI, set-top boxes, streaming dongles, and a whole lot more. So when connecting up a monitor, it’s only natural to reach for a good old HDMI cable you’ve no doubt got lying around.
To keep pace with the technological advancement of these devices, HDMI has gone through several iterations over the years. HDMI 1.0 debuted way back in 2002, supporting 4.95 Gbit/s of bandwidth. Now we’re up to HDMI 2.1, supporting a whopping 48 Gbit/s of bandwidth. That’s enough to drive an 8K display at 60Hz, or a 4K display at 120Hz.
DisplayPort
While fast, HDMI has always lagged behind DisplayPort in bandwidth. Not only is DisplayPort the newer technology, first releasing in 2006, it’s primarily designed to support monitors. You won’t find DisplayPort on any of the current consoles, and there’s only a handful of TVs in the world that support DisplayPort. Think of it as the next-generation replacement for VGA and DVI.
The latest iterations of DisplayPort, DisplayPort 2.0 and DisplayPort 2.1, boast a maximum total bandwidth of 80 Gbit/s. Older iterations of DisplayPort are still competitive with even the latest HDMI. DisplayPort 1.4, which is the interface used on most gaming monitors, sits in-between HDMI 2.0 and HDMI 2.1’s bandwidth and supports 4k at 120Hz.
DisplayPort for PC Gaming
So, when you’ve got HDMI and DisplayPort to choose from on your gaming monitor, you can almost certainly assume that DisplayPort will be the fastest interface. In fact, the HDMI on a lot of gaming monitors isn’t fast enough to drive their full resolution and refresh rate. A blistering fast 1440p, 165Hz gaming monitor would top out at 144Hz if it’s connected over HDMI 2.0, for instance. As long as you’ve got a cable that’s up to spec, DisplayPort is much more likely to work without fuss.
On a gaming monitor, it’s highly likely that DisplayPort is supposed to be the primary interface, while HDMIs are chucked in for good measure as it’s so widespread. We recommend Hooking up your beastly gaming rig over DisplayPort to get the maximum resolution and refresh rate, then plugging your game consoles, captures cards, and more into the HDMIs.
Should You Connect Gaming Monitor to Motherboard or Graphics Card?

With PC gaming, one of the more common beginner’s mistakes we see is hooking a gaming monitor up to the motherboard, rather than the graphics card. It’s completely understandable how and why someone might make this mistake – they look identical. Once you know just how big of a difference this simple, honest mistake can make to your system’s performance, however, you’ll never do it again.
When you connect a monitor to your motherboard, frames won’t be rendered to the display using your system’s discrete graphics card. Instead, it’ll be your processor’s integrated graphics doing all the hard work. Not all CPUs feature integrated graphics, so if you do mistakenly hook up to the motherboard, you’ll know something’s up when no image is displayed. If yours does have integrated graphics – and that includes all AMD Ryzen 7000 Series CPUs and most Intel Core CPUs – an image will be displayed like normal, deceiving you.
You’ll be able to navigate the desktop and browse the web just fine on integrated graphics. It won’t be until you load into a graphically intensive game that integrated graphics will start to struggle, while your gaming-grade discrete graphics card sits idle. If you didn’t know any better, this might lead you to think your discrete graphics card is faulty, when all that’s needed to fix it is swapping a cable around.
Both the motherboard and graphics card’s ports are found at the rear of the computer case. For most PC towers, the motherboard is mounted vertically nearer the top. It’s got a bunch of other ports too, not just display ports – USBs, ethernet ports, audio jacks. On the other hand, the graphics card is mounted vertically further down the case. Make sure the monitor is plugged in here and you’re good to go.
Enabling Maximum Supported Resolution & Refresh Rate
When hooking up a new gaming monitor for the very first time, there’s a high chance it won’t run as its maximum supported refresh rate right out of the box. What’s more, Windows (the most popular operating system for PC gaming) isn’t the best at handing displays. It’s got an annoying tendency to default to lower resolutions and refresh rates, likely for compatibility.
As such, it’s good practice to dig into Windows’ display options and double-check everything’s set to its highest performance. Otherwise, you could be running your fancy-new gaming monitor at its lowest spec. After all, if you’re new to PC gaming and have never experienced a high refresh rate, how are you supposed to tell the difference? It’s all too common to read posts from disgruntled gamers who’ve ran their gaming monitors at just 60Hz for years before realising.
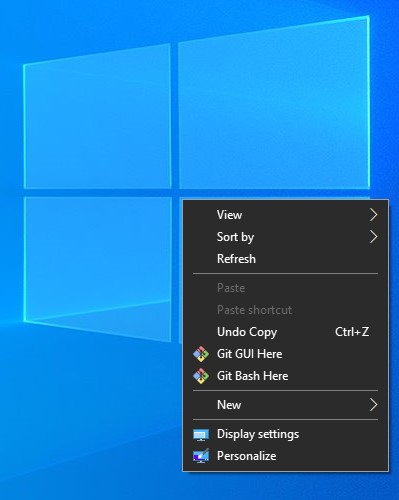
Fortunately, changing a monitor’s resolution and refresh rate through Windows requires only a few clicks, and we’ll walk you through the process. Simply right-click anywhere on your desktop and select ‘Display settings’ on the menu that appears. From the next window, make sure your gaming monitor is selected under ‘Rearrange your displays’, then scroll to the ‘Display resolution’ drop-down menu. Select your gaming monitor’s maximum supported resolution. If you don’t know it off by hand, it’s usually marked as ‘Recommended’.

For refresh rate, scroll further down the ‘Display Settings’ window until you see an option for ‘Advanced display settings’. Click on it, and on newer versions of Windows you’ll be presented with another drop-down box to select your gaming monitor’s maximum supported refresh rate. For those running older versions of Windows (like us), continue by clocking on ‘Display adapter properties’. A new window should pop up. Cycle over to the ‘Monitor’ tab and change your refresh rate from here instead.

Enabling Variable Refresh Rate
While we’re at it, let’s ensure that variable refresh rate (VRR) is enabled too. You might’ve also heard of adaptive sync, or G-Sync for NVIDIA GPUs and FreeSync for AMD GPUs. These are all the same technologies, just with different branding. Whatever it’s labelled as on your gaming monitor, VRR is a must-have feature. However, it’s toggled off by default as not all systems support it.
VRR allows your monitor to synchronise its refresh rate to your graphics card’s frame rate. For example, let’s say you’ve got a 144Hz gaming monitor, but your graphics card can only run a game at 90 frames-per-second. By enabling VRR, the monitor will drop its refresh rate from 144Hz to 90Hz, equalling the frame rate. As the frame rate divides perfectly into the refresh rate with VRR, input lag is minimised compared to traditional V-Sync and screen tearing is eliminated.
Enabling VRR is a two-step process. First through hardware via your monitor’s on-screen display, then through software via your graphics card’s control panel. The toggle for VRR should be easy enough to find on the on-screen display. Though keep an eye out for adaptive sync, G-Sync, and FreeSync as it might not be labelled VRR on your monitor.
To open up the graphics card’s control panel (AMD Radeon Settings for AMD GPUs and NVIDIA Control Panel for NVIDIA GPUs), either use Windows’ search, right-click on your desktop, or find its icon in your system tray. Where exactly the toggle for VRR is varies on the software, but it’ll be somewhere under a ‘Display’ tab or similar. Your monitor may flicker as you toggle between VRR off and on, but don’t worry. Once it’s finished, you’ll be able to enjoy tear-free, stutter-free gaming.
VRR’s effect won’t be immediately apparent when you’re just sitting on the desktop. To ensure it’s working as intended, many monitors feature refresh rate counters you can enable on their on-screen displays. If variable refresh rate is working as intended, this counter should sync up with your in-game frames-per-second counter.
Gaming Monitors at Ebuyer
Once you’ve gone through these checks, you can rest assured knowing everything’s set up for the best gaming experience. Looking for a new gaming laptop to hook up to your gaming monitor? Check out our blogs What to look for in a budget gaming laptop and What to look for in a high-end gaming laptop.