If you’re a dedicated gamer who adores triple-A graphics, incredible framerates, and all the tech that goes into making a computer, you’ve no doubt dabbled with the idea of making your own PC at some point in the past.
Maybe you took a glance at a PC building guide, and perhaps you even picked out a few parts using an online PC builder, but whether because of budget constraints or the daunting task of having to install all those fragile parts yourself, you decided to opt for a prebuilt gaming PC instead.
And there’s nothing wrong with that. Working out how to build a gaming PC can be a bit of a learning curve, and there are plenty of great premade rigs out there that you can find from top brands and tech websites; like Ebuyer’s very own pro-gamer, AlphaSync lineup.
Put simply, having a pre-built gaming PC makes the process of upgrading your old computing setup that much easier. But it’s certainly not as satisfying as making your own PC with specifications tailored to your exact gaming needs.
Yes, understanding how to build a gaming PC can be intimidating to those without any prior technical knowledge, but fortunately, you’ll be glad to know that the process is much more straightforward than it first appears – you just need to be gentle and have a steady hand.
To show you just how easy that process is, we’ve laid out this in-depth, step-by-step PC building guide designed to explain everything you need to know about how to build a custom PC. From exploring the function of each component, right down to hooking up all the bits and bobs to your motherboard and getting your operating system installed.
With our help, you’ll be set up and gaming before you know it!
Our step-by-step PC build guide:
- Things to know before you start building a custom computer
- What components go into making a custom gaming PC?
- Computer case
- Motherboard
- Processor (CPU)
- Memory (RAM)
- Storage
- Graphics card (GPU)
- Power Supply (PSU)
- Cooling options
- Operating System
- How to build your own gaming PC
- Step 1: Preparing a Suitable Workspace
- Step 2: Installing the Processor
- Step 3: Installing the CPU Cooler
- Step 4: Installing the Memory
- Step 5: Installing the Storage
- Step 6: Preparing the Computer Case
- Step 7: Installing the Power Supply
- Step 8: Installing the Motherboard
- Step 9: Installing the Graphics Card
- Step 10: Cable Management
- Step 11: Installing the Operating System
- Adding the finishing touches to your custom-built gaming PC
Things to know before you start building a custom computer
Okay before we get into the nitty-gritty of what part gets installed where, and whether or not you truly need LED lighting on your motherboard, let’s clear the air on a few issues around trying to build your own gaming PC.
You’ll need to bear in mind the compatibility of different components. Not all motherboards will fit all cases and CPUs, nor will every power supply have the wattage to run top-tier graphics cards.
This makes it super important to be sure of your components’ compatibilities before you construct your new PC. We recommend using any of the gaming PC builders currently online, which are geared towards helping those new to the space build a rig that’s satisfactory to their needs.
Finally, just be aware that gathering and connecting all the parts you’ll need to build a custom PC requires both time and patience. There’s always the chance certain components you need may be out of stock, but you shouldn’t substitute the ones you want for another, perhaps cheaper option, unless absolutely necessary.
If you find yourself having to buy each component one at a time over the course of several months, don’t worry about it. It will be more than worth the wait to build your gaming PC exactly how you want it.
What components go into making a custom gaming PC?
So, with all that out of the way, let’s get down to why you’re really here – constructing your very own custom PC.
Well, the good news is that, whether it’s the best gaming rig money can buy, a top-end editing computer, or just a humble work machine for when you’re not in the office, the same construction steps can pretty much be applied to all builds. What might differ, however, are your component requirements.
Now, if you’re clued up on what exactly thermal paste is, and the difference between RAM and storage, you can probably skip this part and go straight to the building process below.
If, however, you don’t know your GPU from your CPU, and would like to know exactly why you need them in your rig, we’ve broken down a list of all the components you’re going to need, their functions, and why they’re important to your new desktop.
Computer Case

Ok, we’ll admit that this one is pretty self-explanatory. Your computer case is exactly that – the case that holds and houses all the components you’re going to need to make your PC function as a computer.
In most cases (pun intended), you’ll most likely be able to buy whatever chassis you like the look of and that’ll be that, though there are a few things you should consider before buying the one with the coolest name – specifically the form-factor of the case in question.
Without getting needlessly technical, form-factor dictates the size of your case overall, and therefore the size of the motherboard and components you can mount inside. Smaller form-factors are more compact and are great for work PCs, but if you want to game and edit, you’ll need something with the space for all those extra cooling fans.
Essentially, if you plan on cramming a lot of gear into your case, you’ll want to go with the biggest form-factor possible – ATX. This won’t increase the price by much and it will leave you with plenty of room to upgrade outdated parts down the line if you’re so inclined.
Motherboard

Arguably the most important part of your PC (yes, more important than your CPU and graphics card), the motherboard is what connects every single component together, allowing them to work in tandem and form a functioning computer circuit.
A PC can’t operate without a motherboard, period.
Think of it as your computer’s nervous system, translating the commands of your CPU to every other component to create a functional network. An isolated CPU is useless on its own, hence why the motherboard is so important.
In general, there’s not much you need to consider with your motherboard besides its form-factor, which we discussed above, as well as the type of CPU you want to use, and how many ports and component slots it contains.
CPU-wise, you have the option between Intel (LGA) boards and AMD (AM) boards. Both are great options and it really just comes down to personal preference. If you already have a preferred brand, go with that one, otherwise, focus on picking whichever motherboard has the right number of slots for your build, as well as the snazziest LED lighting.
With that being said, while motherboards aren’t the most expensive component you’ll be picking up, the more you spend, the more slots you’re going to get. So, like your case, it might be worth buying a bigger board than you actually need so your computer is future-proofed for later upgrades.
Processor (CPU)
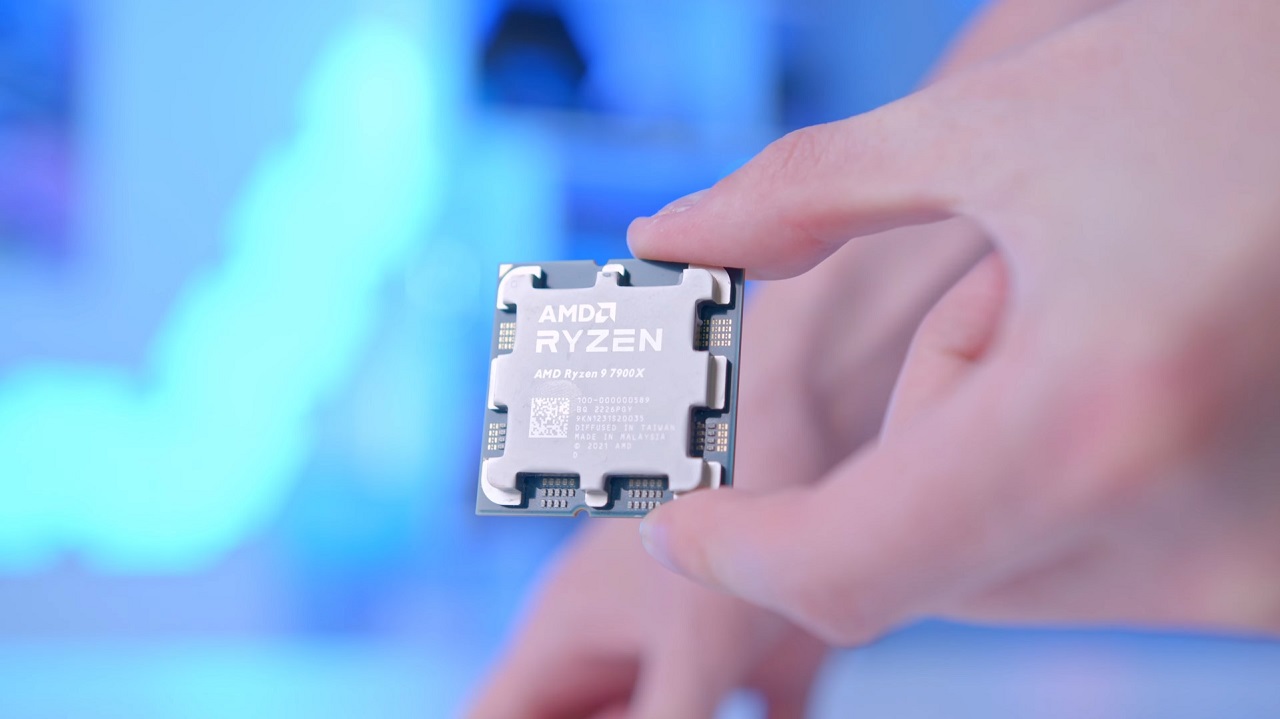
Now we turn our attention to the power behind your computer, the CPU. As you may have already guessed, your CPU is quite literally at the centre of your computer’s world, the heart of your machine.
Controlling everything your PC does, your CPU relays instructions for how other parts should interact before dictating the volume of processing power that should be divided between components. It also governs how fast your computer operates, so in most cases, the more power it outputs, the better.
In terms of the best CPUs currently available, you can’t go wrong with AMD’s Ryzen line or Intel’s i7 range. Both are very similar in their capabilities, though Intel arguably has a slight edge over AMD in terms of the technology used.
As we’ve said above multiple times, CPU choice comes down to personal preference and your system’s processing needs. Once you have one in mind, all you really need to be sure of is whether or not it fits your motherboard.
Graphics Card (GPU)

If you ask any gamer what the most important part of their PC is, almost every one of them will probably say their GPU. And this makes sense, after all, as your graphics card is what translates your CPU’s instructions into stunning visual imagery.
Graphics cards are essential for gaming and creative work. They basically function as a secondary processor on top of your CPU, one that’s optimised for image-based tasks and editing processes. And like your CPU, the faster your graphics card, the better the image and framerate you’re going to get, so they’re worth spending a lot of money on.
In fact, your GPU will probably be the most expensive part of your setup, and there are plenty of brands to choose from. But if you’re not sure what you should be looking for, we recommend a high-end AMD Radeon RX or an NVIDIA GeForce RTX card, both of which can handle the graphical requirements of most modern triple-A games.
Storage

Much like how your computer case physically stores all your computer’s innards, your dedicated computer storage acts as a home for your PC’s operating system and important files. Whether you opt for a hard disk drive (HDD) or a solid-state drive (SSD) is up to you, and most computers will run both for maximum flexibility.
Ideally, if your budget allows for it, you should think about picking up an M.2 SSD. These compact but powerful SSDs offer the fastest boot-up times and take up minimal space on your motherboard, making them particularly well-suited to housing your OS and favourite games. You just need to make sure your motherboard has the appropriate slot for it.
However, if an M.2 is off the cards when looking to build your gaming PC, then a more traditional SSD will be fine, as they still offer faster read and write speeds than HDDs and can match them on storage space. Of course, adding an extra HDD on top of this can be a nice way of providing bonus storage capacity for large apps that aren’t fast.
Finally, in terms of storage capacity, 500GB will be more than enough for your SSD, though there’s no harm in picking an SSD or HDD with 1TB capacity if you want to be safe.
Memory (RAM)

To the uninitiated, you might think that computer memory and storage are one and the same, and in a way they are. To use the brain metaphor again, storage is your long-term, permanent memory, while RAM (random-access memory) acts as your PC’s short-term memory.
RAM stores a variety of useful and essential information that enables your computer to boot quickly or run games and apps at peak performance without slowing down. It does this by eliminating the need to directly access your storage for every action.
Essentially, your RAM will store all the necessary information needed to run an app quickly while you use it, but once you’re done, your RAM will clear itself of all related data or wipe itself entirely when you shut your computer down.
RAM is not permanent storage, so it will never store any data that needs to be saved. This will always be saved to your SSD or HDD, leaving the RAM with plenty of room for temporary app data.
In terms of the amount of RAM you need, 16GB is plenty for a basic PC build, but if your heart is set on making your own gaming PC, then you’re going to need at least 32GB or more.
Once again, like with all your components, be sure that your motherboard has the required number of RAM slots to facilitate the amount you’re looking to install.
Power Supply (PSU)
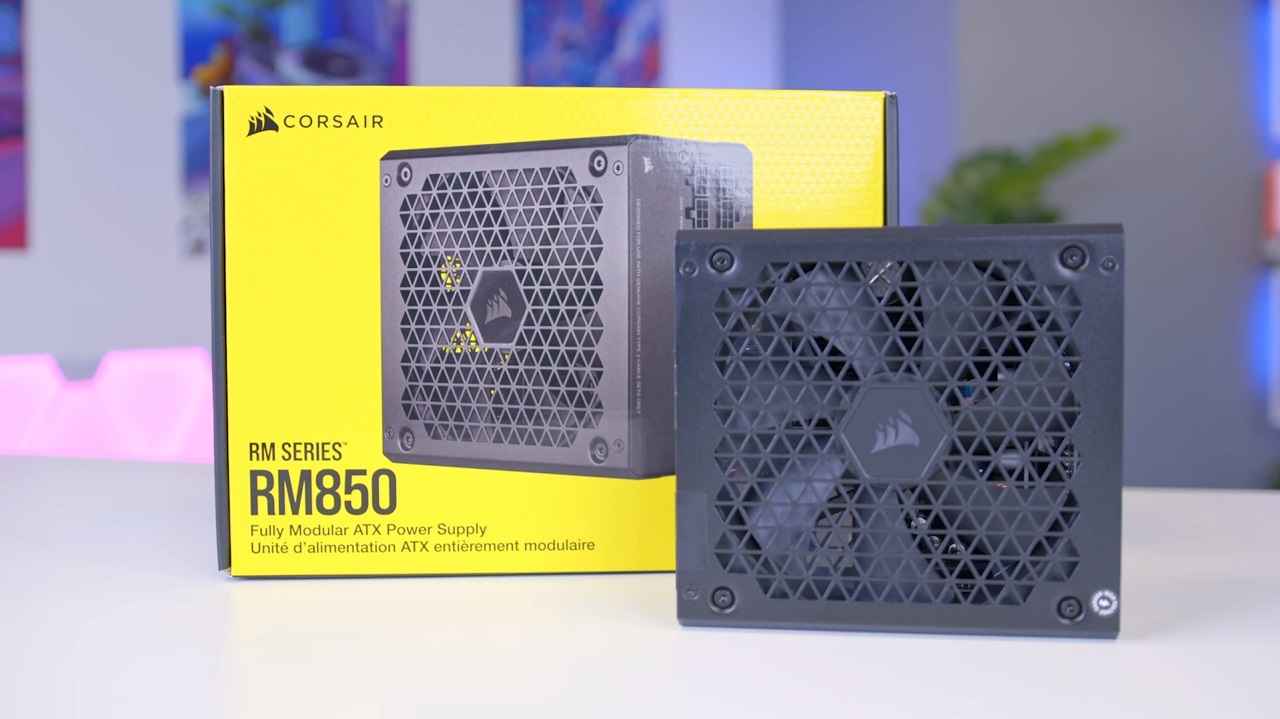
Essential in the sense that it provides the necessary power to all your computer systems, there’s not a lot to concern yourself with when picking a power supply unit. Governing how quick and powerful a PC can be, as long as your power supply has enough wattage to run your system properly, you’ll be fine.
The average gaming PC can operate on a PSU that provides as little as 650W, though faster, more power-hungry PCs will naturally require a higher wattage, and it never hurts to have a little extra wattage to spare if you want to install bigger components in the future.
Cooling Options

We’ve already briefly touched on fans in the case section but they’re worth talking about here as well.
With case fans, you need at least a couple bringing air in, and one taking air out, in order to provide your PC with enough cold air to maintain a functional temperature. Generally speaking, having more fans is always better for keeping those warm components running cold, but never try to install more than your case or motherboard can handle.
Besides fans, you may also want to look at a liquid cooling system, if you have the money. These systems fit around the inside frame of your case and carry heat from hot components to a radiator that cools it.
Liquid cooling systems are incredibly temperature efficient but can be complex to hook up. They’re also not necessary for all but the most powerful computers, so chances are you won’t need to consider installing one if you’re looking to build a custom PC with above-average specs.
Finally, you might need to pick up something known as thermal paste, just in case a component that requires it doesn’t come with a tube. Thermal paste acts as an efficient way to transfer heat from a PC part to the cooling system, keeping the component in question at a low temperature.
Operating System

Last, but not least, anyone looking at how to build a custom PC will need an operating system so that you have an interface to interact with when you boot it up. And if computers aren’t your undying passion, said operating system is almost certainly going to be some variety of Windows software – most likely the ever-reliable Windows 10.
Installing your operating system is a very simple process, all you need to do is ensure you have a legal copy downloaded onto a USB flash drive that you can insert the first time you boot up your computer – everything should be self-explanatory after that.
How to Build your own Gaming PC

Ok, with parts done and dusted (and hopefully all stacked beside you), it’s time to make your own gaming PC!
Now, full disclaimer, every single PC is going to be a unique build unless you’re using the exact same parts as the PC build guide in question. So, to keep things simple, we’ll be providing more of an overview of how each part fits together without directly referencing any brands and components by name.
However, even by following our guide method, you may still experience differences in your build process from what we describe below. If this is the case, you should refer to the manuals that come with the respective hardware. It can also be helpful to watch an online installation to see exactly how your specific parts connect.
Finally, if you find you have to insert your components in a different order than described below, don’t panic, that’s just a nuance of your particular rig and part combination.
So, grab your screwdriver, snatch a handful of cable ties, and let’s get started!
Step 1: Preparing a Suitable Workspace
Whether this is your very first build or one of many, you should always prepare a suitable workspace before you start building to prevent any mishaps.

Make sure you pick a well-lit area with plenty of space to lay your case down, while still having easy access to all your components. It also doesn’t hurt to have a bowl to hand so you can store any small, fiddly objects you need but might lose track of such as screws, stand-offs, and so on.
As for the components, you can remove them from their packaging before you start. To keep your workspace organised and the components protected, however, we recommend unboxing the components only when they’re needed.
Finally, standing on uncarpeted flooring and using a non-conductive surface as your workspace, such as a wooden dining table, will help mitigate the build-up of static electricity, which can discharge into your components and damage them if you’re not careful.
You could also wear an anti-static wristband to eliminate the chances of this happening, though it’s not essential. Rather, touching the metal of a computer case periodically will get rid of any built-up static. Do this every time you go to handle a component and you should be fine.
Step 2: Installing the Processor
Here comes the trickiest step of the build. Don’t worry, while it’s a bit fiddly, it’ll be over before you know it.
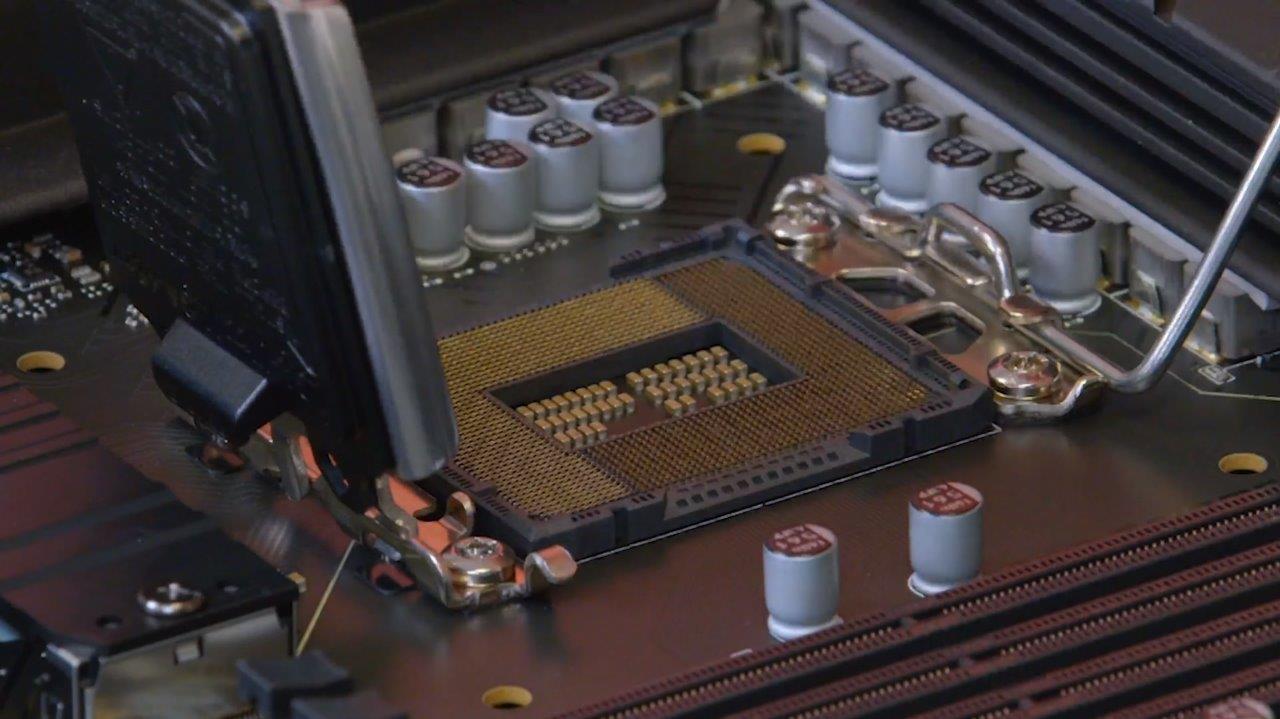
Take the motherboard out of its box and anti-static bag, then lay it on top of said box. Next, you’ll want to find the CPU socket on the motherboard, pictured above. It’s a big square located in the top-middle of the board, but consult your motherboard’s manual if you’re lost. Lift the retention arm next to the CPU socket to unlock it. As you lift, a plastic cover protecting the delicate pins of the CPU socket should pop out.

With the CPU socket now unlocked and exposed, it’s time to install the CPU. Unbox the CPU and, very carefully, pick it up by its sides. It’s vital you don’t touch the contacts on the bottom as any bit of dirt or grease can interfere with the CPU making a full connection with the CPU socket. If you look at the bottom, however, you’ll notice a small, golden triangle. There’s another triangle on the CPU socket too. These indicate which way round your CPU should sit.

So, line these triangles up and gently lower the CPU into place. It should slot in without any fuss. If it doesn’t, don’t force anything. You could very easily damage both the CPU and the motherboard if you do.

Once the CPU is seated, push the retention arm back into place to lock the socket. This will require a little bit of pressure but, again, you shouldn’t need to force anything. Odds are your CPU hasn’t been installed correctly if force is required.
Step 3: Installing the CPU Cooler
Now take a breather, then turn to installing your CPU’s cooler.

First, make sure there’s a backplate to screw into. Most motherboards already have one, but some beefier coolers need their own, so follow the cooler’s manual on how to install it.

What’s more, the cooler might have thermal paste pre-applied, in which case you can install it straight away – just don’t forget to peel off the plastic film on the bottom of the cooler! Otherwise, you’ll need to apply some thermal paste on top of the CPU. A blob no bigger than a pea will do. No need to spread it about either, the weight and mounting pressure of the CPU cooler will be enough.

Next, line up your CPU cooler with the screw holes surrounding the socket. As you lower it on top of the CPU, it will cause the paste to ooze out slightly. If you applied the right amount of paste, however, none of it should reach the motherboard. If it does, dip a paper towel in some isopropyl alcohol and dab the paste off.

Finally, screw in the heatsink using a cross pattern screwdriver. You want it tight so the heatsink makes full contact with the CPU for efficient heat transfer, but not too tight as to warp your motherboard. All that’s left is to plug the cooler’s fan into a CPU fan header on your motherboard. And that’s it – the most stressful part of your build is done!
Step 4: Installing the Memory
After the stress of the last step, you’ll be glad to hear that inserting RAM is one of, if not the easiest, steps in the entire PC-building process. To get started, find the long, vertical DIMM slots on your motherboard, which should be to the right of your CPU socket. This is where the RAM goes.

Open up the DIMM slots’ clips by pushing down on them. Before you go jamming the sticks in, however, you’ll want to refer to your motherboard’s manual. Each motherboard has its own optimal configuration for RAM. If you’ve got two sticks and four DIMM slots, for instance, you might only get dual-channel performance if you occupy the 1st and 3rd slots.

Read through the manual to determine which slots to use, then insert the sticks. Like the CPU, RAM only goes in one way. Line up the notches on the stick with the ones in the slot and slide it in. To know it’s inserted correctly, push down on either end of the stick until you hear the ‘click’ of the clips locking back into place.
Step 5: Installing the Storage
Much like your RAM, hooking up the storage is relatively simple. An M.2 form-factor SSD is the easiest as it slides right into an M.2 slot on your motherboard, no cables required.

Again, you’ll want to refer to your motherboard’s manual to determine which M.2 slot is the fastest. You don’t want to install a super-fast PCIe Gen4 NVMe SSD in a last-gen PCIe Gen3 slot, crippling its speed. Once you find this slot, there may be a heatsink you have to remove first.

With the heatsink out of the way, you’ll need to attach a stand-off to the M.2 slot. There will be several screw holes for M.2 drives of different length. This ensures that the drive lies flush with the M.2 slot for a stable connection. Then, at a slight angle, insert the drive into the slot, screw it down against the stand-off, and attach the heatsink – job done.

As for traditional 2.5” form-factor HDDs and SSDs, there should be a drive bay at the front of your case where they can slide into. Unlike a M.2 drive, these SATA drives require separate data and power cables. Your motherboard will come with SATA data cables, which connect from the drive to a SATA port on your motherboard, while your power supply has slim, L-shaped SATA power cables.
Step 6: Preparing the Computer Case
Processor, memory, storage – you’ve installed all the components on the motherboard you can for now. To install the graphics card, your motherboard must be in the computer case. So, let’s prep your case first by installing any additional fans you might’ve bought.

Start by removing your case’s side panel. For most modern cases, this should be as simple as loosening a couple of thumb screws, which will let the panel pop right off.

With the case open, mount the fans using their included screw to locations indicated by your case’s manual. Make sure they’re secured tightly; you don’t want them ratting against the case when switched on. And don’t worry about the fans’ cables for now, we’ll route and plug them in later.

Where you install the fans is up to you, though we recommend a push-pull configuration: drawing in fresh air from the front of the case, and exhausting it out the back. Usually, there’s a small arrow on the fan housing pointing in the direction of airflow. If not, the exhaust side will be the one with the fan motor.
Step 7: Installing the Power Supply
While your computer case is empty, now’s as good a time as any to slide the hefty power supply in. Where is sits depends on the case, though it’s likely to be at the bottom-rear for most modern models like ours. We recommend installing the power supply with its fan facing down, as this will let it draw in fresh air from underneath the case. If it’s facing up, it’ll recycle the hot air kicked out of the graphics card.

Secure the power supply in place with the screws included with your case, and make sure it’s sitting on the case’s anti-vibration pads. If you’ve got a modular or semi-modular power supply, only plug in the cables you need, then shove them through to the other side of the case for now via the nearest cable management route. Again, we’ll sort all the cables out at the end.
Step 8: Installing the Motherboard
With the case ready to go, it’s now time to attach your motherboard to the case. But first, you’ll first need to insert your motherboard’s I/O shield.

Mounted at the rear of your case, the I/O shield secures all your motherboard’s jacks and USBs in place, so they don’t flex and strain when hooking peripherals up. And honestly, a computer just doesn’t look right without its I/O shield. Inserting it can be a little fiddly, however, so consult your motherboard’s manual to ensure it’s orientated the right way up.

So the motherboard doesn’t touch the metal of your case, short out, and potentially damage all the hardware connected to it, it’s important to install the board on stand-offs. In most cases, these little risers come pre-installed. You might have to screw them in yourself, or remove some if you’re using a smaller form-factor board.

Once you’ve got the I/O shield and stand-offs in, place the case on its side. Lower the motherboard into your case, aligning it mounting holes with the stand-offs, while also making sure the board’s I/O is in line with your I/O shield. Once everything’s in place, use the mounting hardware that comes with your case to screw the board into the stand-offs. Tighten each screw a little bit at a time as to not bend the board.
Step 9: Installing the Graphics Card
You’ve made it to step 9? Nice! Seeing as the graphics card is the last major component to install, you’re on the home stretch now. After this, managing the cables is all that’s left. Although the graphics card is enormously important in a gaming build, mounting it is fairly easy. But before you can insert your GPU into the PCIe slot on your motherboard, you’ve got to make room for it first.

So, remove the PCIe brackets at the rear of your computer case. On some cases, these should pop out by hand easily enough, while the PCIe brackets on top of the range cases can be removed with a screwdriver and re-installed if needed. How many PCIe brackets you need to remove is determined by the size of your graphics card. With a two-slot-thick graphics card, you’d remove two PCIe brackets.

Once these brackets are out of the way, it’s just a matter of sliding the graphics card into the PCIe slot. Do note that your motherboard may have multiple PCIe slots, one of which will be the fastest. So, consult your motherboard’s manual to find out which one’s best for your graphics card – it’s likely to be the highest up the board.

Push down on the little clip at the end of the PCIe slot to open it up, then hover your graphics card over the slot. While keeping the card at a straight angle, slot it in. Then, like the RAM, you’ll need to push down on the graphics card until you hear a ‘click’. This is the little clip locking back into place.

And that’s the graphics cards installed. With how hefty modern graphics cards are, however, the PCIe slot is put under a lot of stress. So, to alleviate some of this weight, screw the graphics card’s bracket into where you removed the PCIe brackets.
Step 10: Cable Management
Okay, with every component in its place, now’s the time to hook up all the cables. Although it’s tempting to rush this step, take your time. You don’t want to whack a random connector into the wrong port. This could irreversibly damage it, or worse, cause your whole build to short-circuit when switched on.

Also, try to route your cables in the most efficient way possible. Neat cables not only look good, especially if you’ve got a case with a tempered glass side panel, they make future upgrades way easier as you’ll know exactly where each cable goes. However, hold off using zip ties to bundle your cables together until you’ve booted your PC up for the first time. You want to be able easily unplug and shuffle cables around if something’s not working.
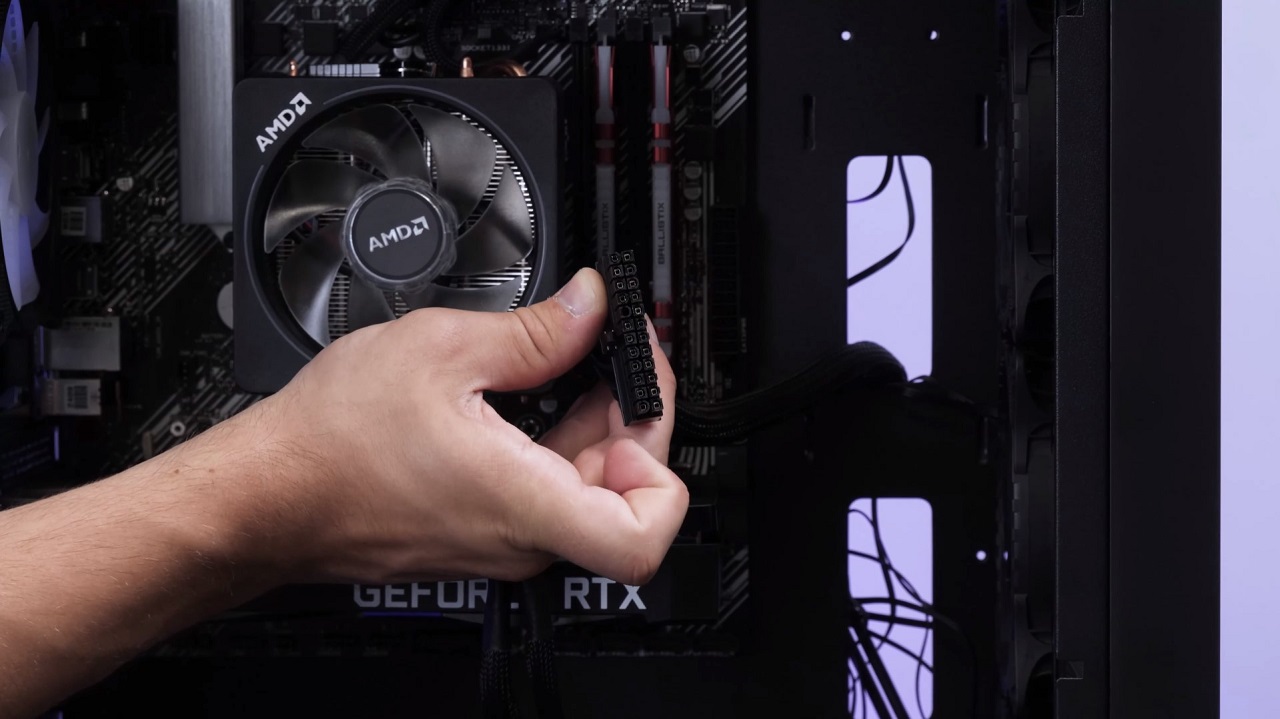
You should’ve already hooked up some components like the CPU cooler, but let’s run through the rest. From the power supply, take the chunky 24-pin cable and plug it into the corresponding connector on the right-side of your motherboard. The 4/8-pin cable goes in at the top-left of the motherboard, powering the CPU. PCIe power cables hook up to your graphics card, though the amount needed varies by model, and SATA power cables plug into your SATA drives. Don’t forget about your fans either, they plug into fan headers on your motherboard. Most of these cables have little tabs on them which clip over the connector, letting you know they’re inserted correctly.

Lastly, you’ll want to wire up the case’s front-panel connectors, for the power button, USBs, and so on. This is where your motherboard’s manual comes in handy, as it’ll have diagrams and graphics showing your exactly where the connectors need to go.
Step 11: Installing the Operating System
It’s finally time to turn your PC on. So, flick the switch at the back of your power supply, attach a monitor, mouse, and keyboard, and hit the power button. Hopefully, after a few beeps and whirs, everything should light up.

If not, power it down, unplug the power supply, and go back in to check all the connectors are fully seated. Otherwise, you may need to re-install the components themselves. This should be easy enough for the memory and graphics, but reseating the processor can be a bit of a pain as you have to remove the whole cooling assembly first. If your PC still isn’t booting after all this, then it could mean something’s broken and will need replacing.
Once your PC is up and running, insert your flash drive with the operating system’s installation media on it, then enter the BIOS using your keyboard. How you enter the BIOS varies by motherboard. So, keep an eye out when booting your PC for a splash screen with the key press needed, or read the manual – it’s likely one of the functions keys. Navigate the BIOS until you find the boot order sequence. Set it to boot from your flash drive first and save changes. When you restart your PC, it should automatically pull the operating system from your flash drive and start the installation process.

You’ll need to choose which drive to install the operating system to, as well as a username and password, but otherwise you’re done – you’ve built your own PC! When it’s finished, you can eject the flash drive, set the BIOS to boot from your operating system’s drive, tidy up the remaining cables, slap on the side panels, and take your new rig for a spin.
PC Gaming at Ebuyer
Of course, your new PC won’t be complete until you’ve picked up a brand-new gaming monitor, keyboard, and mouse. Fortunately, we have all these and more right here in the Ebuyer store!
Order now to make use of our express delivery options and don’t forget to keep an eye out for new deals on more powerful parts. After all, one of the best things about a custom PC build is that you can upgrade it any time you want, letting you stay up to date with the power required for the latest triple-A releases.